Thursday, September 18, 2014

Honda CRF250L DRC tail light and indicator upgrade

A detailed installation guide for installing the DRC edge2 tail light and DRC 602 indicators.

We'll start with tail light.


Remove the seat and side plastics.


I got the wiring plug so I'll be using that in this example.


Unplug the connector and undo all the bolts holding the tail light so it can be removed.


I added the indicators to the new tail light, next we connect the supplied oem connector. I used some crocodile clips to make sure the wiring was correct before proceeding.

This came with the connector but just in case:

Black: Ground
Yellow: Running light
Red: Brake signal
Blue: Right turn signal
White: Left turn signal


You'll notice the indicators flash at high speed, this will be sorted out when we install the fixed rate flasher but for now we're good. I elected to solder the wires in place but you do get a lot of connectors in the kit should you wish to use them.


And all installed


Next we move to the fixed rate flasher. Remove the right hand shroud. 


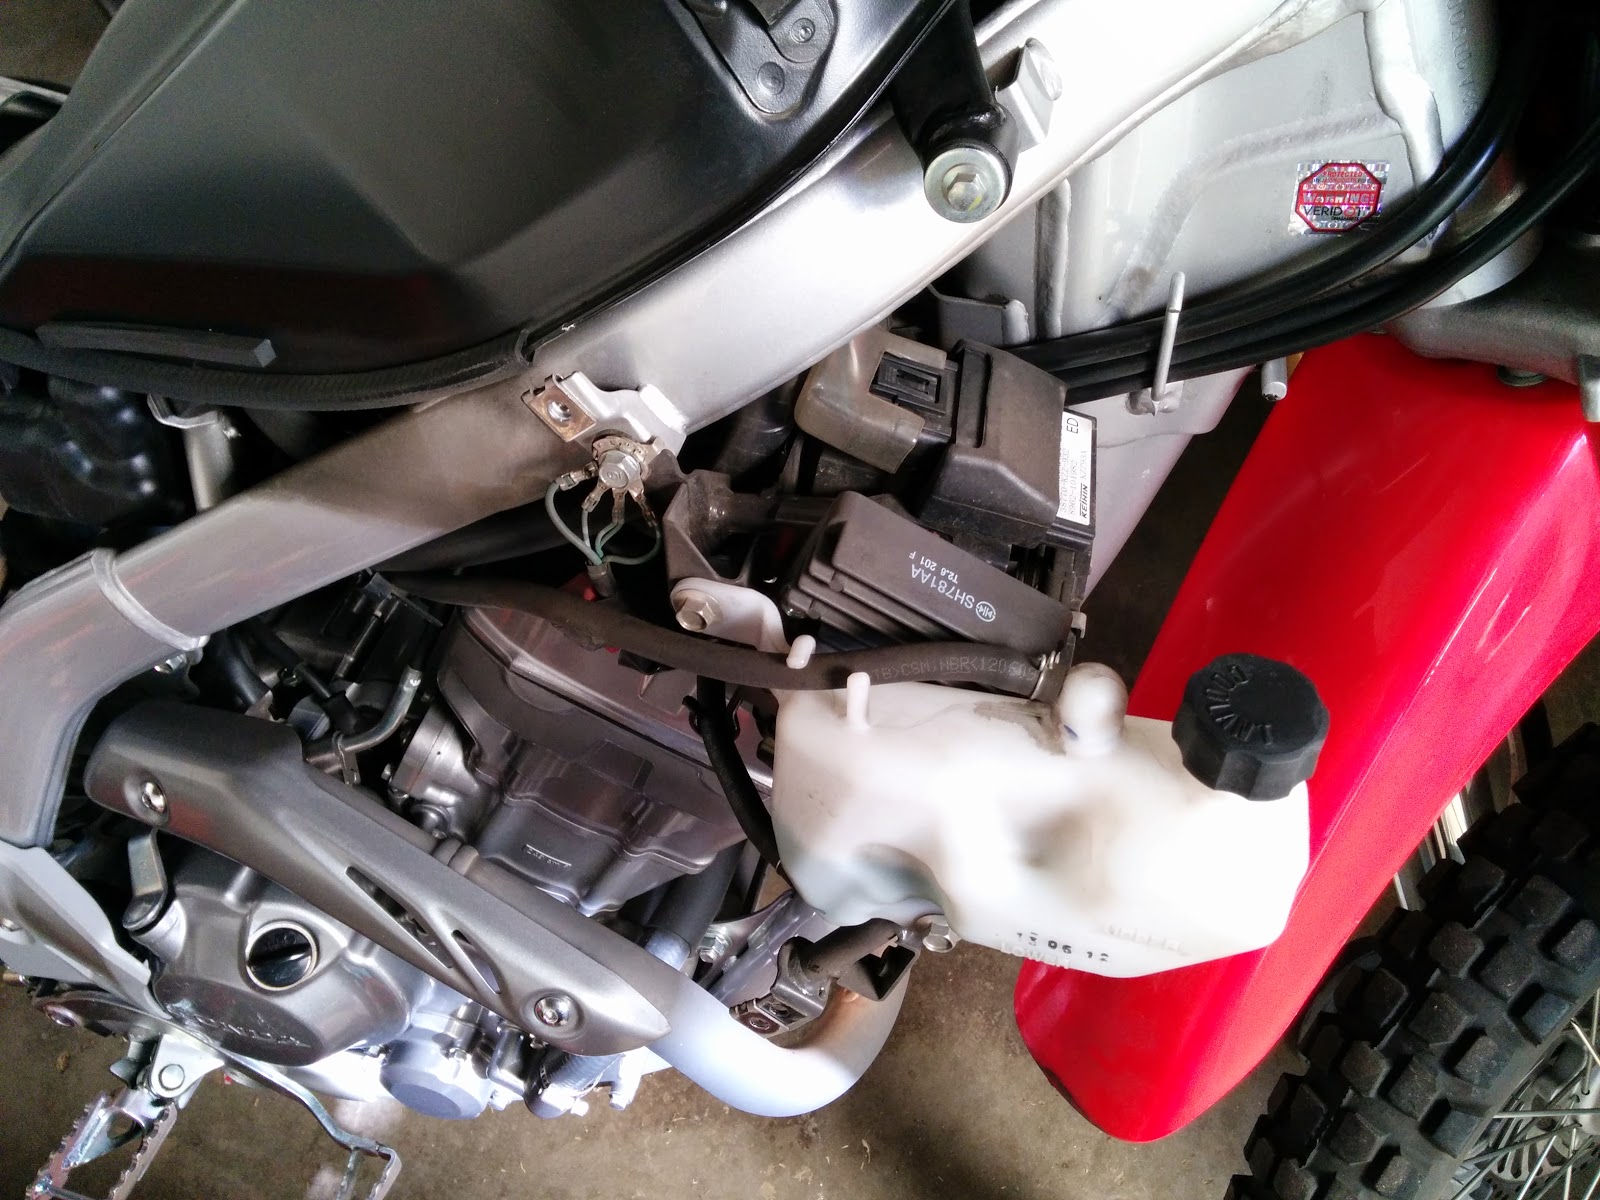
The part behind the water bottle unplugs at the bottom


You can remove the stock one form its position. It's held on by some sort of elastic rubber band, so it's a little tough, but it does come off. Fixed rate flasher plugged in:


Sadly this doesn't fit in a nice secure manner like the original but it'll be held in place by the shroud.


Now's a good time to test those lights again, they should be flicking at normal rate now. Next we loosen the headlight, there are 4 bolts two on each side to do that


I unclipped the two indicators and removed them


Next up I cut the wires so I could attach the new connectors, of course I used some crocodile clips to make sure I had the right wiring


Next up I removed the upper fork clamps and put the brackets in place to hold the new inidicators and re-tightened them.


Then it was a case of trimming wires to the correct length and hooking everything up. You can put on the plastics again and move on to the last task, the number/licence plate holder.


Mine was rather large and I couldn't get it to fit nicely without filing down the top frame of the holder. One done it fits beautifully and looks so much better than the stock setup.


And of course a quick walk around


A quick parts list from 12oclocklabs:

  • Fixed Rate turn signal flasher
  • Honda CRF250L tail light turn signal connector
  • DRC Turn signal mounting brackets. Type 9902.
  • DRC Type 602 turn signals. Lens colour: clear. x4
  • DRC Edge2 Tail light. Colour: Red


Monday, September 8, 2014

LED lights and a tail tidy

After my recent broken left rear indicator housing and the nice big quote from Honda Sandton an alternative needed to be sourced. I did some research and settled on the DRC Edge 2 tail light and DRC 602 indicators. I decided to go LED 602 on the front as well so there's the same consistent look front to back. I'm very happy with the results. From:


To:


Which looks a million times better. I took quite a few pics so when I get some more time, I'll throw together a detailed guide.

Saturday, August 9, 2014

Broken

I walked out to the little Honda CRF250L ready for the commute to work only to find my rear left indicator hanging from my bike.


On closer inspection it looks like the housing broke somehow, I may have knocked it getting on the bike but it's clearly not a strong point on the bike.


I'm not sure how this happened but I've temporarily fastened it with a cable tie.

I took a drive to Honda Sandton this morning, to see what a new one would cost. I need to purchase the entire unit, just the housing isn't available, but it's over R900 which seems like a lot of cash for something with clearly isn't designed to last.

I'm going to be investigating some LED indicators with the hopes of being able to ship them here cheaply will report back with my decision.

Monday, August 4, 2014

Low fuel

The little Honda CRF250L has been ticking along nicely. I've had a little jerking at low fuel levels before but I seem to have got the fuel level rather low on my commute the other day. On a perfectly straight road pulling away from a stop was enough to swish the fuel backwards in the tank and cause a massive hole in the power delivery as no fuel was available. It was far more pronounced than the last time I experienced this. I was very nervous stopping on a slope and rode with very smooth movements to the nearest station where I filled up. It took 7.4L of fuel so there should have been another 300ml remaining, so it was low but the fuel starvation and resultant power loss is very concerning. I generally do try to fill up as soon as possible when the fuel guage starts flashing, I obviously left that very late in this instance and it's definitely something I'll try to avoid in the future.

Sunday, July 6, 2014

The puncture

On my way home from work on Friday the bike was feeling a little weird, turns out it was a puncture as I discovered a very flat tyre today.


I removed the wheel and got the tube out. Patched it and put it back in only to hear a lovely stream of air at the valve. The valve was looking nasty, all corroded and obviously I did something when I was struggling to put it back. I haven't even take the tube out again. I'll just take the whole tyre in tomorrow and get them to replace the tube. This is the offending bit which caused the puncture:


Hopefully that'll get sorted out tomorrow and I'll be good to go for another while.

Monday, April 21, 2014

Wash and Grease

Today was wash and grease day for the little Honda CRF250L!


After a wash down the wheels were removed.


Grease was inserted into the gap between the spacers and bearings.

After that I removed all the dirty marks on the plastics and gave it a quick waxing. This is the end result.


I still battle with getting the seat clean and haven't found a good solution to get the black marks completely off.

Fuel consumption on the last tank was 3.55L/100km.

Friday, March 14, 2014

Service Time

Bike was booked for a service at Honda Sandton today (14th March 2014) exactly a year into ownership. Picked it up a little earlier, the bill came to R1035.96. Doesn't seem like much was done, mostly oil and oil filter and the gasket for that, then some general lubing. Hopefully we're good to go for another year then! I'd like to strip her down sometime and perform a proper lubing, something I always do regularly to my off-road bikes. There will of course be lots of pictures when that happens.


Thursday, March 13, 2014

It never rains, it pours

It's been a while since I updated this so here goes. It's been raining here a lot lately so I have been caught in a good few rainy rides. The little Honda has held up fine. The roads are not doing so well though, there are serious potholes forming everywhere. I have hit a few and the Honda seems to cope with them just fine, they're almost irrelevant which is awesome. Fuel consumption is still around the 3.5L /100 km mark.

On Friday is the second service and exactly one year of ownership so I will be reporting back on that once it's done.